Источник:
https://sumitnarayanpotbhare.wordpre...65-for-retail/
==============
Hi Guys, In this blog, we are going to visit
Return location functionality which is based on retail info codes. Any returned item at POS is not necessarily used in any other sales transaction and often goes into a defective/damage location. Prior to the introduction of
Return location functionality, all sales and returns would go to the same location setup under the Warehouse master. Using the Retail info codes, cashiers can identify the reason for a return when a customer returns a purchase.
With the introduction of this feature, you can specify that returned products are assigned to different return locations in inventory
based on the cashier’s response to info codes and reason codes that are displayed at the POS.
A return location can be a warehouse, a location within a warehouse, or even a particular pallet, depending on what inventory locations your organization has set up. You can map each return location to one or more info codes in Retail and reason codes in Sales and marketing.
Let’s start with the Initial setup that is required to run this functionality.
Return info codes
Navigate to
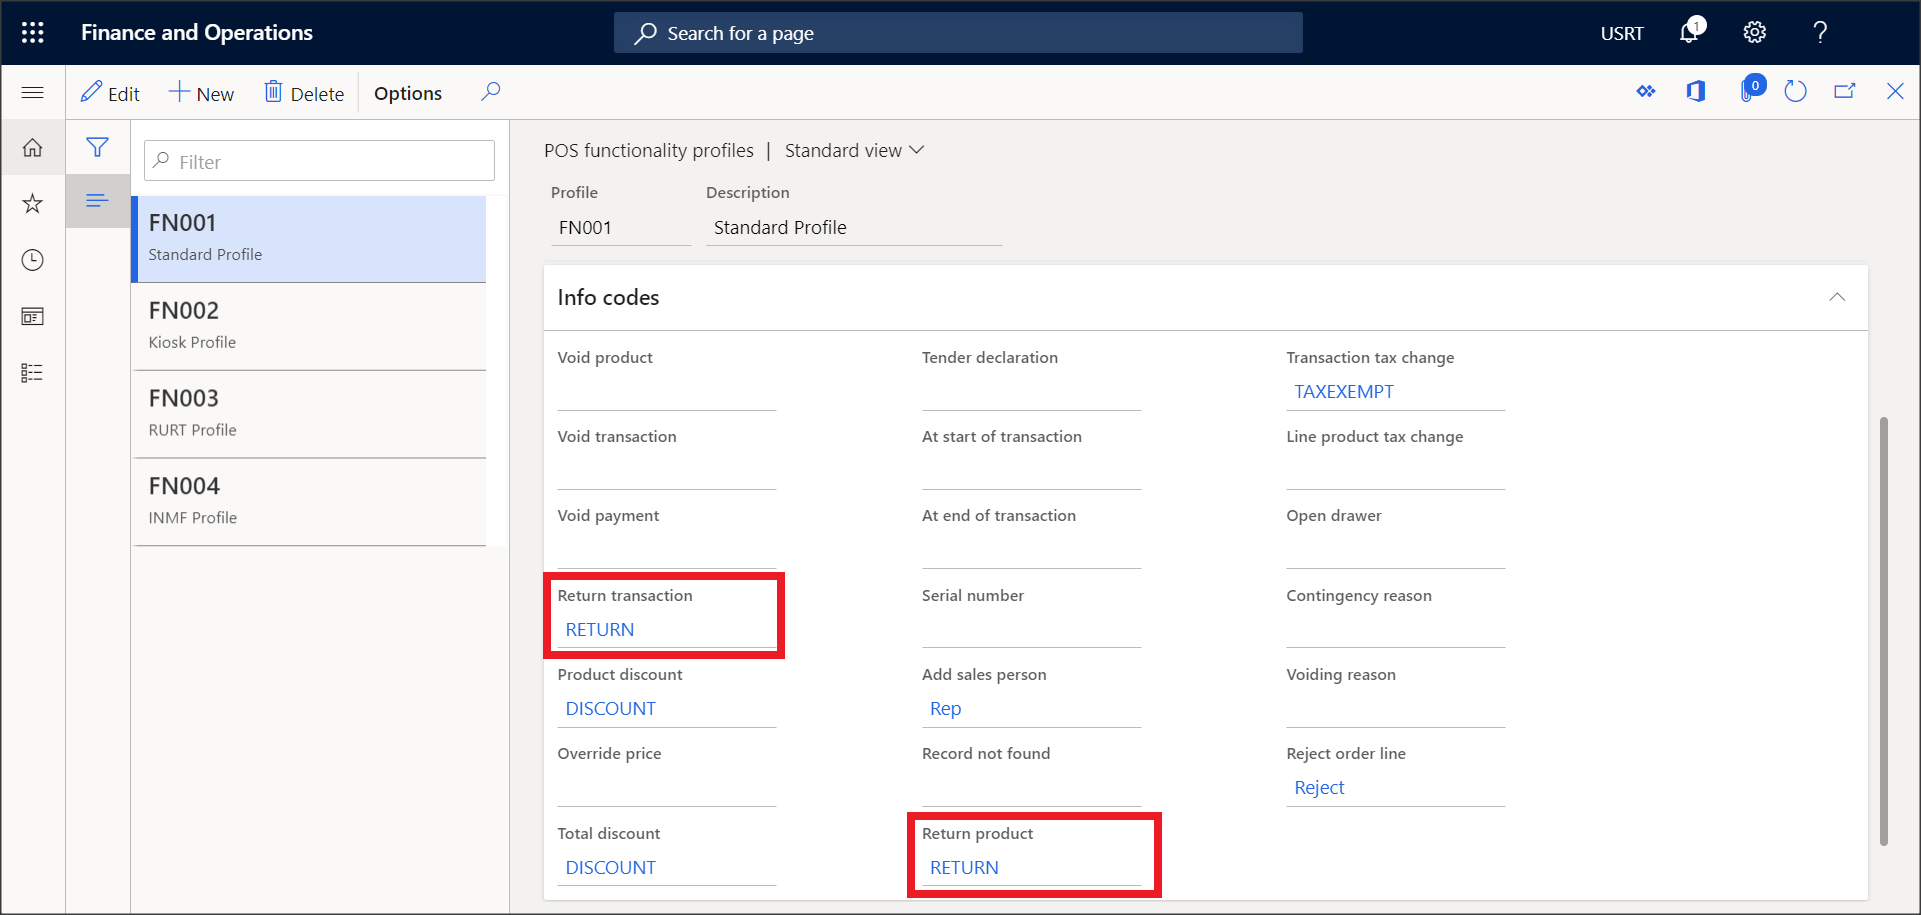
Retail > Channel setup > POS setup > POS profiles > Functionality profiles.
Setup the info codes under
Return transaction and
Return product in
Functionality profile assigned to the Store.
 Return location policy
Navigate to
Retail > Inventory Management > Return location.
As you can see, we have 3 Retail info codes defined for the
Return location setup. Under Info code select the same Info code setup in the
Functionality profile under
Return transaction and
Return product.
For this example, we are using
Houston Store. Let’s understand the setup –
- Returns marked as Defect subcode, go to Return location.
- Returns marked as Disliked subcode, go to HOUSTON (default issue location) location.
- Returns marked as Outdated subcode go to different warehouse HOUSTONDEF and Defected location.
The Store column identifies the source Store where the transaction is performed and the Warehouse column decides the destination location to move the inventory.
Please note: The movement to these warehouses and location happens after statement posting is performed for the Return transaction.
 Warehouse Setup
Navigate to
Inventory Management > Setup > Inventory breakdown > Warehouses.
This is the inventory location for returns whose info codes or reason codes are not mapped to return locations.
 Retail product hierarchy
Navigate to
Retail > Products and categories > Retail product hierarchy.
This is a vital set up to assign the Return location policy to the Category hierarchy. Make sure you select the correct legal entity while setting this up.
 Action….
The initial stock for item
81306A is
20 quantities in the
HOUSTON location.

For this illustration, we are going to perform
4 sales with each having 1 quantity and then
return for each of them.
Return transaction 1: Use Info code –
Defect
Return transaction 2: Use Info code –
Disliked
Return transaction 3: Use Info code –
Outdated
Return transaction 4: Use Info code –
Size (This info code is not set up under Return location policy hence should go to the Return location setup under Warehouse master)
Stock level after the statement posting of above 4 sales and 4 return transactions.

As per the Return location policy set up,
- 1 quantity that was returned using Defect Return info code, is added to HOUSTON – Return (Warehouse – Location).
- 1 quantity that was returned using Disliked Return info code, is added to HOUSTON – Houston (Warehouse – Location).
- 1 quantity that was returned using Outdated [COLOR=var(--color-text)]Return info code, is added to HOUSTONDEF – Defected (Warehouse – Location). Due to the Block inventory checkbox that 1 quantity is reserved under Inventory blocking.[/COLOR]

- 1 quantity that was returned using Size [COLOR=var(--color-text)]Return info code, is also added to HOUSTON – Return (Warehouse – Location). [/COLOR]
If you closely observe, then you will find that the return going to HOUSTON – Return (Warehouse – Location) should also have an Inventory blocking instead of the blocking under HOUSTON – Houston (Warehouse – Location). Not sure if this is due to some bug or the missing setup. I will try to find and update this blog later.
I hope this blog helps you in some or the other way in this Retail Journey.
Feel free to reach out for any clarifications. If you like my blog posts then comment and subscribe to the blogs.
Please follow me on
Facebook |
Google+ |
Twitter | Skype (sumit0417)
Enjoy RetailDAXing.
Disclaimer: The information in the weblog is provided “AS IS”; with no warranties, and confers no rights. All blog entries and editorial comments are the opinions of the author.
Источник:
https://sumitnarayanpotbhare.wordpre...65-for-retail/