|
|
#1 |
|
Участник
|
Gareth Tucker: Installing the Customer Care Accelerator (CCA) for CRM 2011
Источник: http://gtcrm.wordpress.com/2011/07/1...-for-crm-2011/
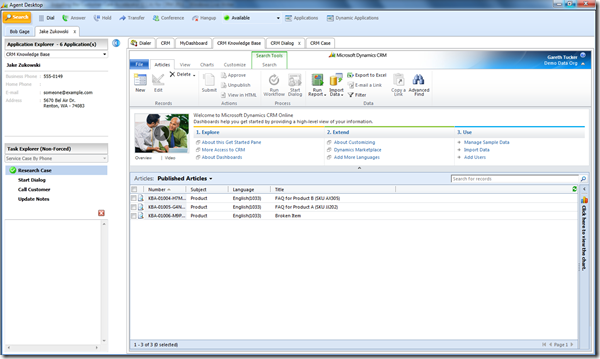
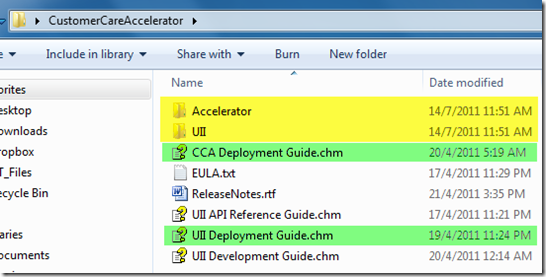
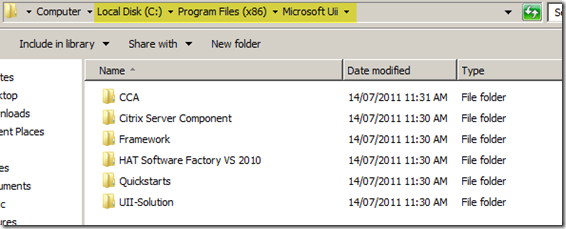
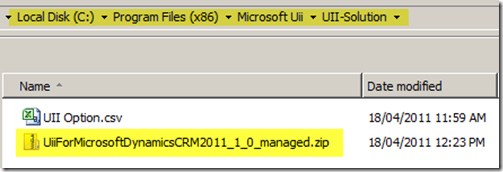
============== Today I’ve been having fun with CCA and CRM 2011. The install process is a little cumbersome so here’s a install guide that might just save you some time. I strongly recommend reading this before attempting the install. For those that just want to see what CCA looks like, here’s a sneak peak:  WARNING: you shouldn’t even bother looking at CCA unless you are down with the fact that a CCA CRM implementation is in reality a complex custom dev project. CCA is not a solution, it’s not really an accelerator, it’s a development framework. It’s still very cool, but if undertaking a large custom dev project is not your thing… walk away. Background on the Installation Process: First, some background that will help. There are 2 layers that you install. First is the Microsoft User Interface Integration framework. Second is the Customer Care Accelerator (CCA) reference implementation. The CCA bit is essentially an example deployment of the framework. The download files are source code. You need to follow the instructions to adjust the source code and compile it to build the Agent Desktop. The Agent Desktop is the app that the end user would use. If you want to see what CCA looks like this is your end game. Also note you can install CCA onto a VM and configure an on premise system or you can install CCA on to your laptop and configure it against a CRM Online instance. Here’s the install steps: 1. Download the CCA files from the CRM Marketplace here  2. The download file is a cab file that contains a zip file. Unzip that file to your desktop (note: you might find this a slightly peculiar process, but with a bit of juggling you’ll get there)  Your unzipped folder contains an Accelerator folder (the CCA install files) and a UII folder (the UII framework install files). You also get a couple of handy deployment guides. You’re going to need to work through those, I’ll point you at those as we go along.  3. Open the UII folder and run either the 32 or 64 bit executable inside (depending upon the machine on which you are working on). Not much guidance required for this wizard, I went with the Complete install and installed to the default location. 4. Go back up a folder level and then open the Accelerator folder. Again, run the 32 or 64 bit executable inside. This one unzips a few more files into the install folder. 5. You should now have a Microsoft UII folder containing all the source code. We work from this folder from now on (apart from the deployment guides which are back in that folder on your desktop)  Next step, is to import some solution files into your CRM organisation. A CRM 2011 organisation is required here. The CCA Agent Desktop is used to present and integrate multiple business applications to end users inside a single desktop. This accelerator demonstrates this using Microsoft CRM as an example application. But CCA also leverages CRM as its backend data store for holding configuration data. So there’s a bit of dual use going on here. As a result we need to import 2 solution files into the CRM Org you are going to use to demo CCA. These solution files both provision the backend configuration requirements of CCA and also configure CRM’s sales, service and marketing features to give us some demo scenarios that can be showcased through the Agent Desktop. 6. Import the following 2 solutions into your CRM organisation:  and:  7. Whilst you are in CRM there’s a couple of data files to import as well: import the file below:  and import this file too (map to the UII Hosted Applications entity and fix the 2 field mapping errors before you process the file):  8. And if you haven’t loaded the standard sample data into your CRM Organisation do that now (In CRM, go to Settings, click Data Management, select Sample Data and then follow your nose). 9. Open the UII Deployment Guide chm file and follow the instructions in the 2 sections highlighted below:  Note: you will hit an issue when you try and compile the CompositeUI.Windows solution. I found the answer to this issue on this post. You’ll need to change the target framework version of the CompositeUI.Windows to be framework 4.0 (right-click on the CompositeUI.Windows project, go to the properties, change the target framework there). After doing so you’ll also need to remove the references to PresentationCore, PresentationFramework, UIAutomationProvider, and WindowsBase and add the respective 4.0 versions. They can be found in this folder: %windir%\Microsoft.NET\Framework\v4.0.30319\WPF 10. Open the Microsoft.Crm.Accelerator.Cca.AgentDesktop.sln solution file and build the solution. This will generate the RIConfigLoader application for us.  11. Run the RIConfigLoader executable from the location below:  12. Create a new connection, provide the credentials required. If uncertain of your CRM Service URL you can find this in CRM at: Settings –> Customizations –> Developers Resources. Look there for the Discovery Service URL.  13. Once connected, select your Organisation and then click Deploy:  14. Next, create a TEMP folder on your local C: (the Agent Desktop is going to want to write a log to this location and will crash if it doesn’t exist)  15. Locate the Agent Desktop’s config file and open it in Notepad or Visual Studio:  16. Map the organizationServiceUrl key to your CRM organisation. Again you can get this value in CRM at Settings –> Customizations –> Developers Resources. The value you want this time is the Organization Service URL. Also, if you are connecting to CRM Online change the authenticationMode key from “Windows” to “Online”.  17. Launch the Agent Desktop:  And all going well up will pop the CCA Agent Desktop, complete with CTI toolbar and embedded CRM screens:  The toolbar buttons take a little while to become responsive so give the screen a little while to ‘warm up’. Click the Search button in the top left corner to initiate a customer search. Once you select a customer there a CCA session is created for that customer. Click the blue arrow to reveal an important part of the desktop…  … and you will see the customer’s details and a workflow list from which you can initiate a CCA workflow:  Click “Service Case by Phone” for example and the tasks for that workflow appear on screen:  and as you click through those the main window reveal screens relevant to that workflow task. Hope someone out there find this useful Regards, Gareth.  Источник: http://gtcrm.wordpress.com/2011/07/1...-for-crm-2011/
__________________
Расскажите о новых и интересных блогах по Microsoft Dynamics, напишите личное сообщение администратору. |
|
|
|
|
|