|
|
#1 |
|
Участник
|
Gareth Tucker: Adding Record Creation Buttons to the CRM 2011 Ribbon
Источник: http://gtcrm.wordpress.com/2012/01/1...m-2011-ribbon/
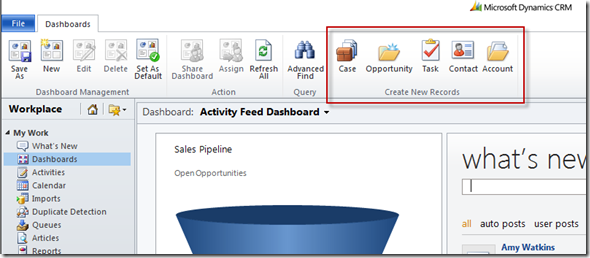
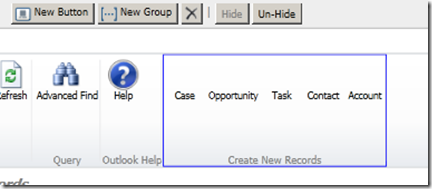
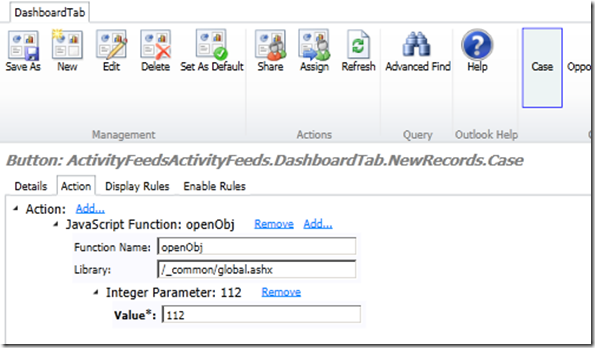
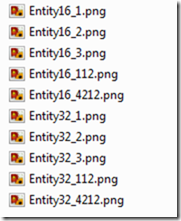
============== I was recently asked how to move the Create New Case button from the Case ribbon to the Queue ribbon. I was initially sceptical of this being possible, but after a little investigation found that in a roundabout way it is. In this post I will demonstrate this approach but with a more widely applicable scenario – I will add a collection of quick create buttons to the Dashboard ribbon. And I’ll demonstrate the process using the awesome new Ribbon Editor from TanGuy (thanks mate, you are a rockstar!). Here’s what we want to end up with:  Ok, so first thing to do is download TanGuy’s Ribbon Editor from here. The tool doesn’t need to be ‘installed’ as such I like to place the unzipped files on to my C drive and then create a desktop shortcut to the exe. Launch the app and connect to your CRM instance using the first button on the menu:  And then click the 2nd button on the menu, and open the Case entity’s Ribbon definitions:  By default the Case entity’s Form ribbon is displayed to you initially. I want to look at the definition of the New button and that exists on the ribbon that displays above the Case view so from the menu change the Ribbon Type dropdown to Homepage:  TangGuy’s tool will now display a simulated version of the Case’s HomePageGrid ribbon (so cool!). Click on the New button and you will see the definition of that button appear below:  Now, I want to recreate this button so initially I thought I would note the images defined here for the button and set my new button to use those. But, the image used is the same for all entities so I would end up with a pretty dull looking ribbon if I did this:  So, instead I will find the individual entity images CRM uses and use those. I will come back to that later. Here, looking at the Case ribbon definition we want to determine the jscript function called by the button. Click on the Action tab and then click the small arrows to expand what is displayed:  I originally thought I would see the button calling a CreateNewCase function. Instead you will see Microsoft have designed a generic function that the new button on each entity can call passing in a unique entity identifier parameter to control which entity form is popped. To replicate these buttons on the Dashboard ribbon we can call the same function and explicitly specify the entity identifier. We are heading into unsupported territory here and there is a risk this solution won’t work after an upgrade but it’s an easy change to undo and if you needed to find an alternative approach in the future it wouldn’t be hard, this way is just the quickest. Ok, now that we know what to do we need to switch to the Dashboard ribbon. Click the Open button again and select Application Ribbons:  The Dashboard ribbon is then displayed by default:  So we can start making our edits. Click the Create New Group button and then assign a unique ID to the new Group:  Click on the Title of the new group that appears on the simulated ribbon and then click the New Button button:  Give your new button a unique ID:  And then repeat to add additional buttons for each CRM record type you want to support. By default the button group will be displaying your buttons as small buttons stacked vertically. This is a bit ugly and we have plenty of space on the ribbon so select the button group and then change the Template to one that displays the buttons as large buttons:  And you should end up with a nice list of buttons:  Next step is to add the jscript call to each button. For this we need to know the unique identifier of each entity. For this, I downloaded and installed the MetaData Browser from here. This is provided as a managed CRM solution so you import the file you download into CRM and then access the tool from within CRM. With this tool you can easily search for your entities and locate their unique identifiers:  Ok, back to the Ribbon editor. Click on the Case button and then select the Actions tab and add the following:  Repeat for each additional button, entering their unique identifier (Object Type Code from the Meta Data Browser) in as the Integer Parameter value. Final step is to assign each button an image to pretty things up. I want to use CRM’s standard images for each entity so I will go looking for those on the CRM Server. These images can be found in your equivalent of the below folder: C:\Program Files\Microsoft Dynamics CRM\CRMWeb\_imgs\Ribbon Microsoft employs a consistent naming convention made up of an “Entity” prefix followed by the image size followed by the unique entity identifier. So for my 5 entities (1,2,3,112, and 4212) I want the following files:  Now, we could grab these files and load them into CRM as web resources and then reference the web resources in our ribbon definitions but easier still is to just reference the files on the server in the same way that the standard ribbon buttons do (although this might need adjusting after an upgrade if Microsoft renames or moves those files). Here’s what I entered for my new custom Case button:  Adding the image references for each of my remaining buttons has me ending up with this:  I click Save to update CRM:  And can then immediately see my new buttons appearing on the Dashboard ribbon:  A quick test, and yes they also work:  That’s it. You could go on and add language translations and display rules for the buttons but I won’t go into that here. To migrate this customisation to another environment simply include the Application Ribbons component in your Solution file. If you would like a copy of this customisation I have a solution file available here.  Источник: http://gtcrm.wordpress.com/2012/01/1...m-2011-ribbon/
__________________
Расскажите о новых и интересных блогах по Microsoft Dynamics, напишите личное сообщение администратору. |
|
|
|
|
|